Showing posts with label bonsai wire. Show all posts

Friday, September 23, 2011

Bonsai tree: Takeo Kawabe’s bonsai garden


Source: Bonsai Tonight
Takeo Kawabe’s bonsai garden

When I saw the following photos from Boon’s visit to Japan, there was no doubt about whose garden they belonged to. I simply do not know that any other garden contains comparable material.

Carving project

Carving project

Ichii

Ichii

Bob King offered me additional photos from the same visit, and again, the photos were unmistakable.

Shimpaku

Shimpaku (Bob King photo)

Satsuki

Satsuki – massive trunks! (Bob King photo)

The toolshed, while not a giveaway, offers yet more evidence.

Kawabe workshop

Bonsai wire and tools (Bob King photo)

Kawabe workshop

More bonsai tools – note array of power tools throughout

The garden belongs to Takeo Kawabe. Kawabe studied with Kimura for 12 years before heading out on his own in 1989. He is the creator of many famous bonsai tools, including grinders, chain-saw like devices and most recently, a line of bonsai scissors. His garden contains some of the best “wood” anywhere. His impressive carving and grafting skills have combined with great artistic vision to produce some truly outstanding bonsai. He is, in many senses, where good bonsai comes from.

Kawabe Takeo

Kawabe Takeo (Bob King photo)

If you get the chance, I highly recommend visiting his garden or checking out his book – Bonsai Craftsman (His Soul and Footsteps). If anyone knows where the book might be available outside of Japan, do share!

Shimpaku

Kawabe’s famous Shimpaku – it twists like a tornado

Shimpaku

Beautiful deadwood
Read more!
Thursday, September 22, 2011

Bonsai tree: Why Our New Bonsai Aesthetics Wire Is Such A Great Deal

It’s mostly about price…

But it’s also about quality…
Have you tried our NEW BONSAI AESTHETICS WIRE? We started selling it in June, and about a half ton later the verdict is in: it goes on easily and it holds very well. So well that’s it’s hard to tell the difference with wire that costs twice as much.
Which brings us back to the price…

100 gram rolls
are only 2.95 each with easy to achieve volume discounts of 10% to 30%

1 Kilo rolls
are only 21.00 each also with easy to achieve volume discounts of 10% to 30%  
We just unloaded a new shipment yesterday, so every size is now in stock
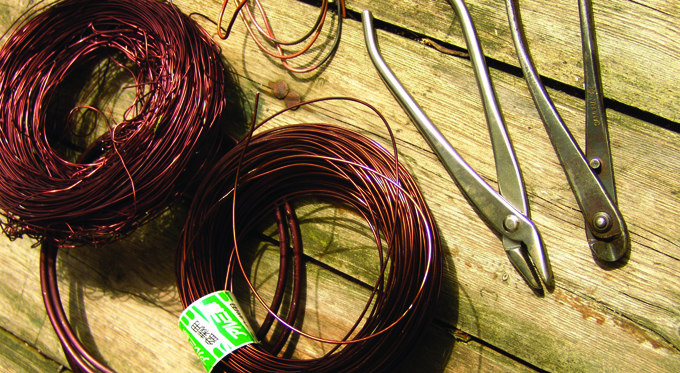
Here’s a photo of some Japanese wire (which we also offer at discounted prices) and some stainless tools (we’ve got those discounted too). The photo is by our friend Morten Albek (author of Shohin Bonsai). Note: Bonsai Aesthetics wire is much darker in color than the Japanese wire.

This is what a top notch wiring job looks like. It’s by Mario Komsta (see our previous post). The wire here looks like copper rather than aluminum. Copper is much more expensive and trickier to use. The vast majority of bonsai enthusiasts now use aluminum wire (that’s what our Aesthetics wire and our Koyo wire is), though some old pros and a few others, still use copper.

Source: Bonsai Bark Read more!
Wednesday, July 13, 2011

Bonsai tree: Korean hornbeam – summer work

Source: Bonsai Tonight
Korean hornbeam – summer work

Korean hornbeam can grow dense with little effort. To encourage interior shoots, I need to thin the foliage. I do this by cutting new shoots back to 2-4 leaves and completely removing extraneous shoots from overly dense areas.

Korean hornbeam

Korean hornbeam – July, 2011

After removing the unnecessary leaves, I decided to lower a few of the branches. I remembered that the branches on the right side of the tree pointed upward a bit more than the branches on the left. You can see this more clearly without the leaves.

Setting the tree in the pot to ensure fit

January, 2011 – note upward pointing branches on the right

To make these branches better match the angles of the other branches, I used several guy wires. There are a number of ways to set up guy wires. For this tree, I stuck to a simple set-up. First step – cutting two short lengths of aquarium tubing.

Aquarium tubing

Aquarium tubing

To create an opening for the wire, I cut a slot in one of the tubes by bending it and taking a small slice from the top.

Cutting a slot

Creating an opening for the wire

This will be used for the top branch – the one to be lowered. I slip the bottom section of tubing into place as is.

Prepping the wire

Guy wire with tubing

After slipping the first section of tubing onto the wire, I place the tubing below the anchor branch and feed the ends of the wire through the openings in the tubing with the slot. I decided against shooting the set-up in place as there were too many branches in the tree’s interior to tell how things are connected. Here’s the basic set-up.

The guy wire contraption complete

Guy wire set-up

After wrapping the wire with tubing around the anchor branch and the branch to be lowered, I twist the wire with my fingers to hold it in place. I then lower the branch with one hand, and use pliers to take up the slack in the wire with the other.

Guy wire detail

Guy wire detail

Korean hornbeam

Hornbeam – after thinning and adding guy wires

Why not simply wire the branches that need to be lowered? One thin guy wire does the same work as a very heavy wire wrapped around the branch. The process is simple and uses less total wire.

Why use plastic tubing? The tubing slows the rate at which the wire cuts into the bark and it protects the bark from injury and discoloration.

I don’t know if the branches will set before the leaves fall off this autumn. If not, I’ll leave them in place – or remove and replace them – when I work on the tree this winter. Read more!
Friday, August 20, 2010

Bonsai tree: Hinoki workshop

Source: Bonsai Tonight
Hinoki workshop

Last weekend I had the opportunity to attend a Bay Island Bonsai workshop run by Daisaku Nomoto. I selected a tree I’ve been working on for the past 15 years – a hinoki. The tree improves every year, but slowly, as hinokis are notoriously slow growing. A year and a half ago, Boon and I performed some heavy bending to get the main branches closer to where we wanted them. This year the work really paid off. Here are some before and after pictures:

Front – before
Front
Front – after
Right – before
Right – after
Left side – before
Left side – after
Back – before
Back – after
Read more!
Tuesday, June 8, 2010

Bonsai tree: Developing Ramification on Deciduous Bonsai: 3

66-6
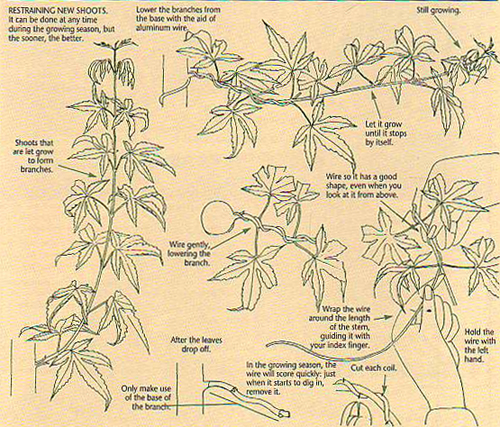
The third and final set of illustrations in the series (first set, second set). This one deals primarily with shaping with wire after the pinching and pruning has been completed. I suspect that where it say RESTRAINING NEW SHOOTS (top left corner), it should say TRAINING NEW SHOOTS.
The final step in our series is on training the new shoots. Notice how it is suggested that you do it sooner rather than later after the shoots have started to harden. Shaping with wire is almost always the best way, though sometimes just pruning is enough. Once the shoots have been shaped, you need to continue pinching and pruning to keep them under control.
BT66decid3
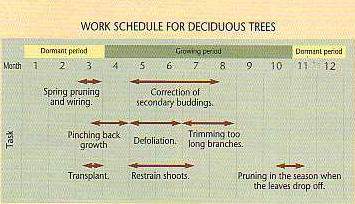
This calendar is probably for around Tokyo. You’ll need to adjust for the climate where you live. To give some idea of how much difference there can be; here in northern Vermont, trees usually don’t leaf out until around mid-May.

Source: Bonsai Bark Read more!
Saturday, May 22, 2010

Bonsai tree: The Wiring Game

BT1wiringame
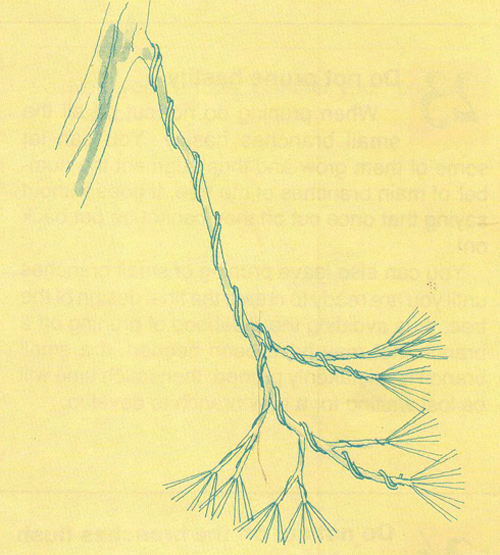
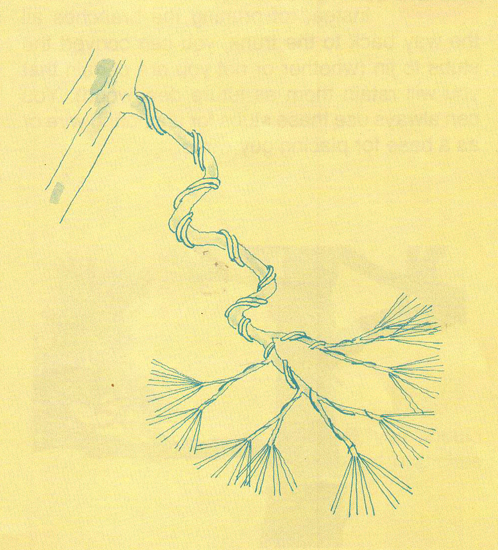
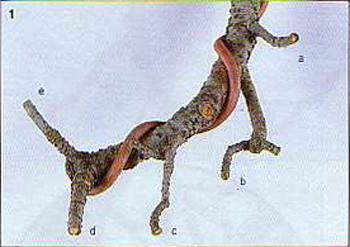
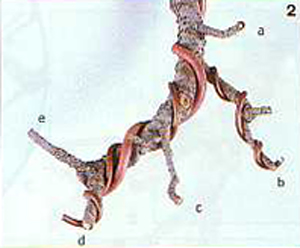
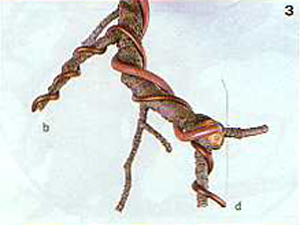
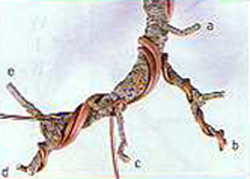
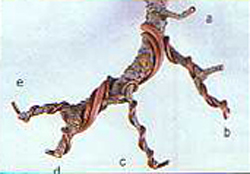
The photos below show how to wire a primary branch and five secondary branches without crossing wires; presented as an interesting and instructive game. BTW: if you need any wire for your own wiring games…
wire1
Wait! Before you go any further, see if you can figure out how to wire all five secondary branches (a-e) without crossing any wires.

wire2
Step one. Start with b and d. Top view.
wire3 
Step one, bottom view.
wire6 
Step two. Wiring c and e in process.
wire7
Step two, c and e finished
Step three. What about branch a? How would you do it?

Source: Bonsai Bark Read more!
Tuesday, May 18, 2010

Bonsai tree: Developing Japanese winterberry

Spring work for this small ilex serrata is straight forward. I want the primary branches to thicken so I let them run. Aluminum wire helps them set in place.
Japanese winterberry – before
Japanese winterberry – after
If you look closely, you can see that the apex is much smaller than the main part of the trunk. It will take several years for the apex to catch up, so I expect to let it run for some time.
I’ll need to pay close attention over the coming weeks to ensure the wire doesn’t cut in. Scars heal slowly on deciduous hollies and the branches can swell quickly. Read more!
Wednesday, May 5, 2010

Bonsai tree: Setsu-goyo White Pine

Below is a White Pine ‘Miyajima’ (grafted/aka setsu-goyo) that I recently restyled for a client. The tree had a few flaws that I was able to hide by rotating it a few degrees clockwise in the pot. After a few short hours of wiring, I think it’s much improved. Of course, there’s always room for improvement…how about air-layering the top third of the tree off and making a nice chuuhin bonsai?…guess we’ll save that for another day.
DSCN6937DSCN6943 Read more!
Monday, May 3, 2010

Bonsai tree: Coming Soon: Field Grown Bonsai Stock

Field grow
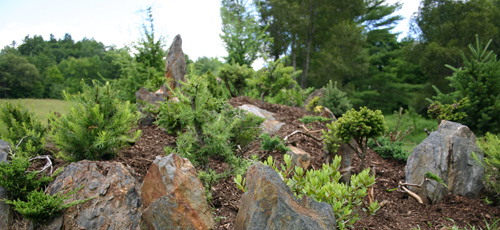
One little man made hill that serves as landscaping and as a growing bed for future bonsai.
I’ve started digging some of my field grown stuff and putting them in plastic containers. Soon we’ll start photographing and putting some up for sale.
More than half of what I’ve been growing are larches that have been collected here in northern Vermont. All have been pruned some. Some has been wired and a few have even been carved. Most are not bonsai pot ready, but all have good potential.
When they are ready, I’ll be putting them up here and on Stone Lantern.

Source: Bonsai Bark Read more!

Thursday, April 8, 2010

Bonsai tree: Transplanting Tips: An Uncommon Technique

trans6
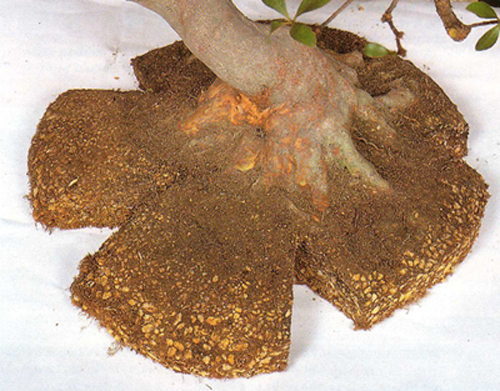
Mystified? If you are not familiar with the technique shown here, you just might be.
The technique shown here is particularly good if you want to replenish the soil while leaving some of the roots undisturbed. Doing this lessens stress and hastens recovery.
The technique is useful when you want move a tree from a larger to a smaller pot, or into a pot that has a different shape. It also works when you want to replenish some of the soil and then put the tree back into the same pot and is particularly useful for repotting forest plantings.
Read more!

Tuesday, March 23, 2010

Bonsai tree: Wiring tricks and tips

straight
We all know you can add curves to a branch that is too straight, but did you know that you can also use wire to shorten a branch that is too long?
notstraight
Now it’s much shorter and much more interesting.
Read more!

Saturday, March 13, 2010

Bonsai tree: Wire Sale

Wire
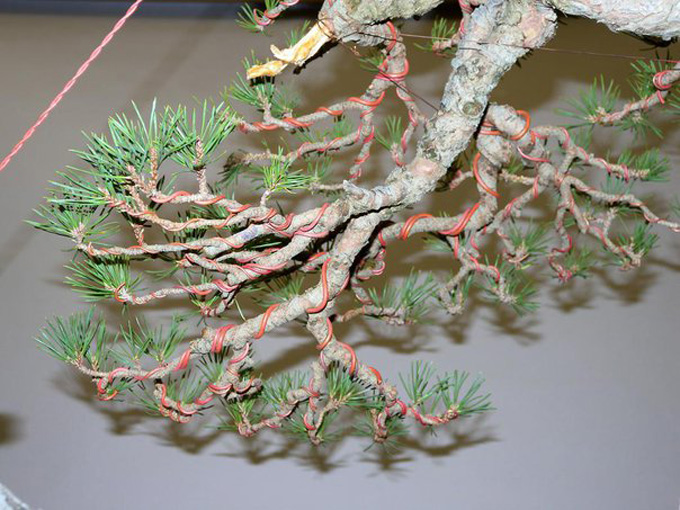
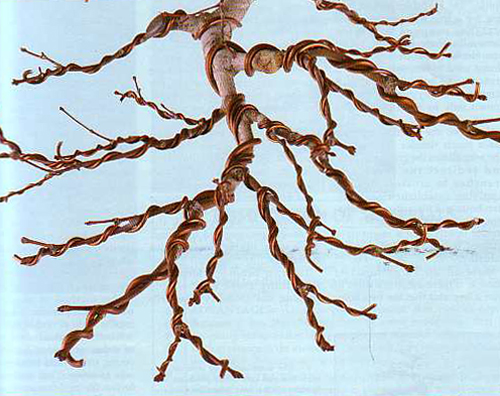
A close up of wired branches on a Japanese black pine.
Not all types of trees are typically wired at the same time of year. And all climates aren’t the same anyway; spring in San Diego comes at least three months before spring here in Vermont (not to mention the bottom half of the planet where everything is backwards) and so forth. It probably goes without saying that all people aren’t the same either. Some ignore the advice of others and just wire when they want. Others strictly adhere to the old masters’ ways, but even the old masters’ ways vary some anyway. The upshot is, at any given time, someone, somewhere is wiring a bonsai. Why not you?
We are expecting a large shipment of wire from Japan sometime in April.
By the way, our wire is copper colored aluminum. It’s much easier to use than copper and less expensive too.

Source: Bonsai Bark Read more!