Sunday, July 31, 2011

Bonsai tree: Bella Bonsai Arte

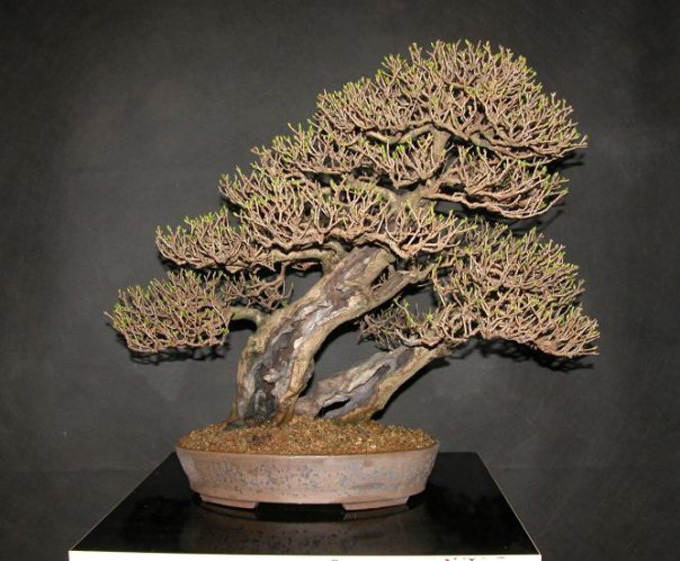
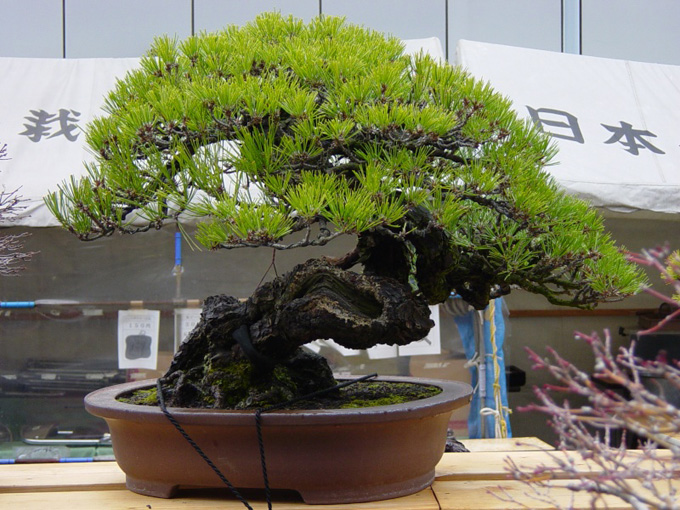
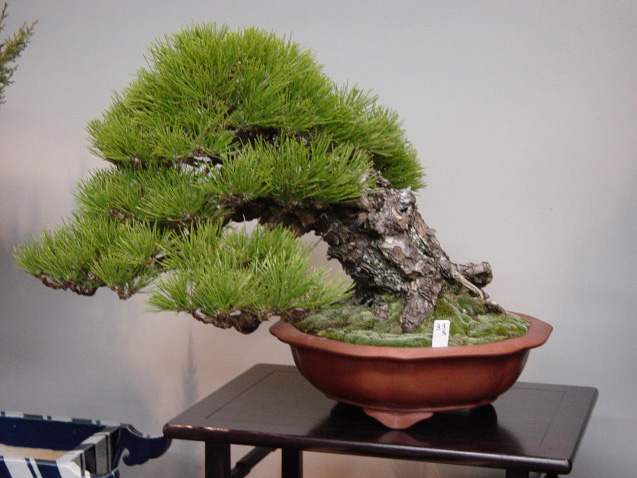
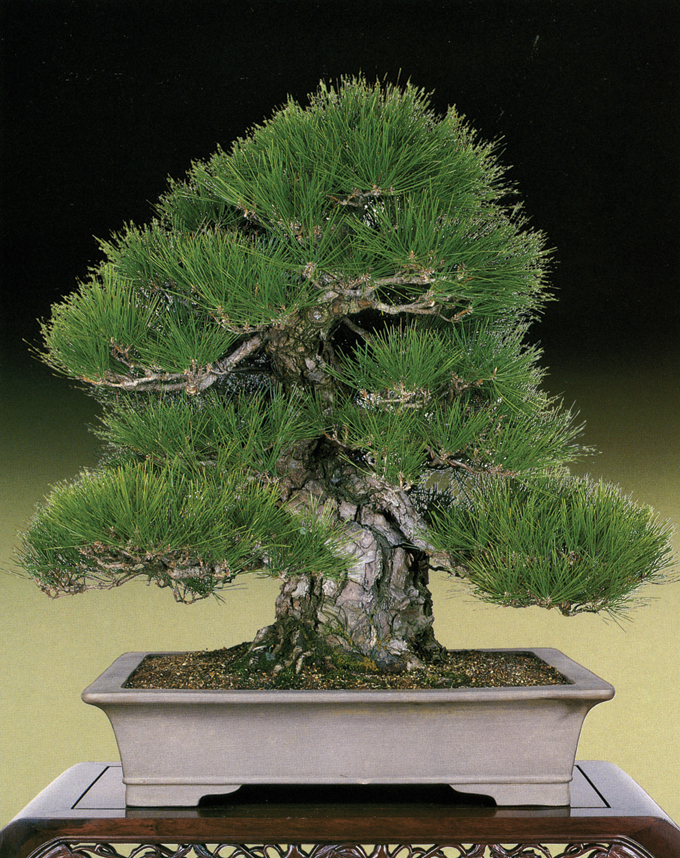
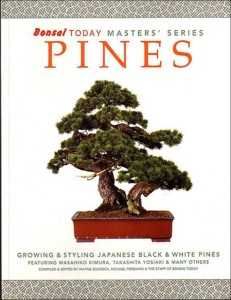
What great tree tree. It’s a black pine by Mauro Stemberger (all the trees in this post are Mauro’s) and it’s so full of unique character that I can’t say enough about how much I like it. So I’ll just shut up (except to say, that, it would be interesting to know the history of this tree… and speaking of pines, the 2nd printing of our classic pine book is now in stock).

Another Italian Renaissance

Mauro Stemberger is one of several talented and innovative young Italian bonsai artists. It helps to live in a culture where art and artists are so respected (even revered) and art and beauty are everywhere; both man made and natural (all this, and the best food in the world… now, if the Euro would only come down a bit). But just being Italian isn’t enough; talent, passion and a large doses of time and effort also help.

Bonsai Dream

The trees in this post are all borrowed from Mauro’s website: Italian Bonsai Dream.

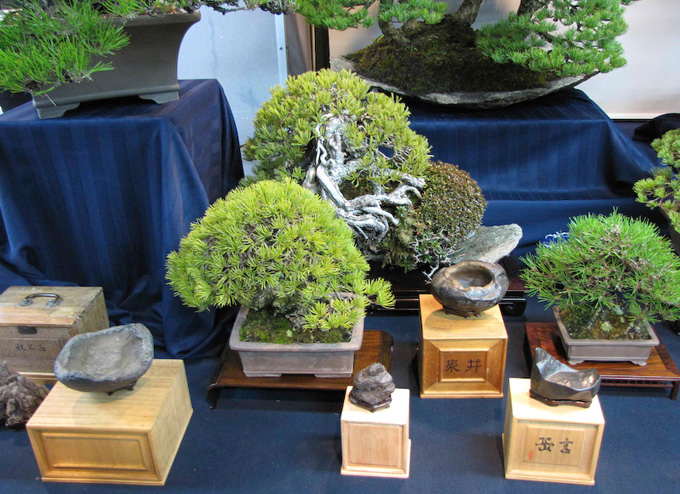
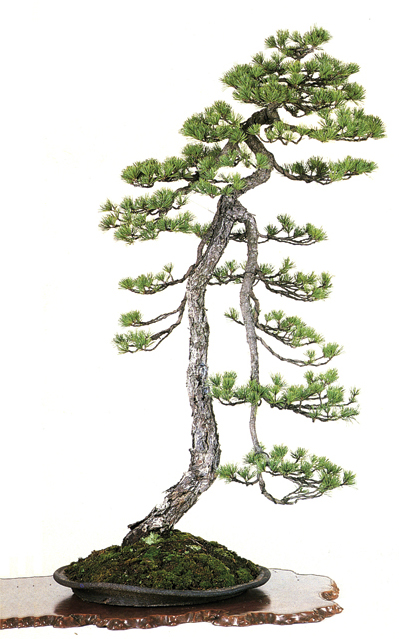
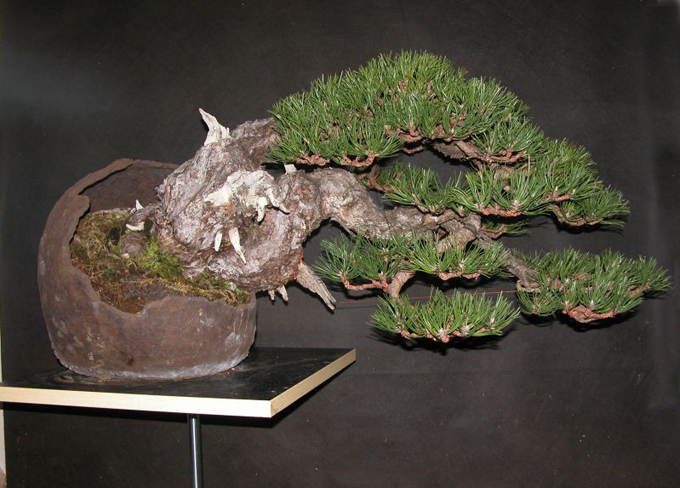
Scot’s pine. Some bonsai look a lot like other bonsai, but not this one. Especially unusual is the way the trunk lays along the ground and then dips down below the top of pot on its circuitous route from base to crown.

 
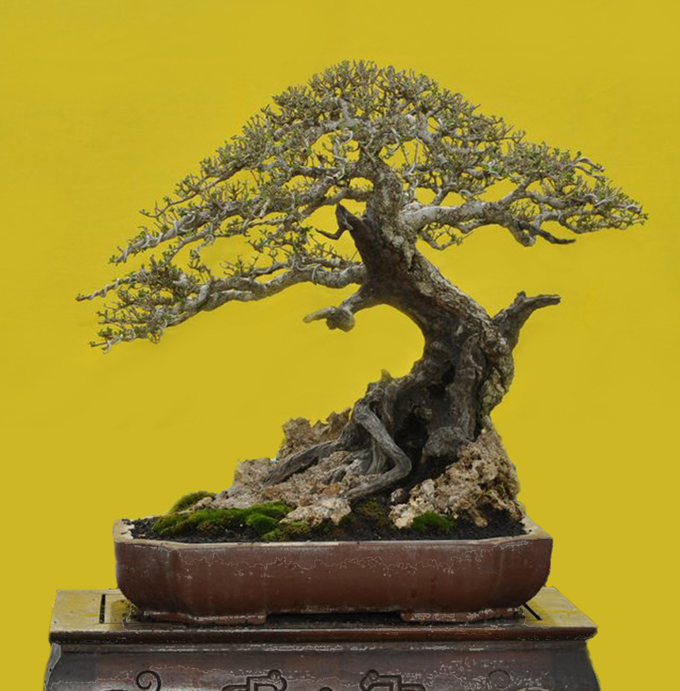
Recently defoliated privet. Mauro has plenty of excellent trees, but I picked this because it’s not only excellent, but it’s a privet, and you just don’t see that many privet bonsai. I wonder if started its life as a part of hedge.

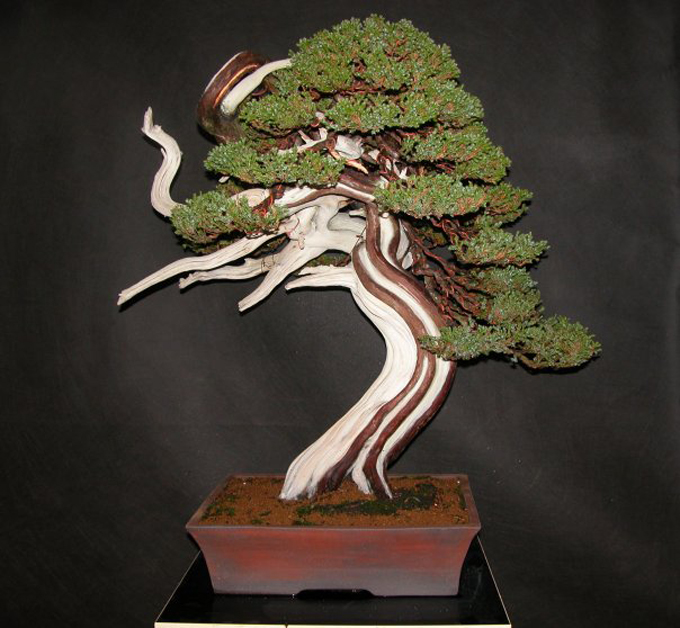
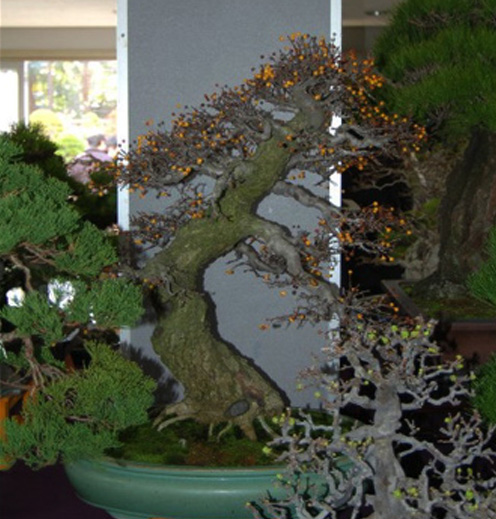
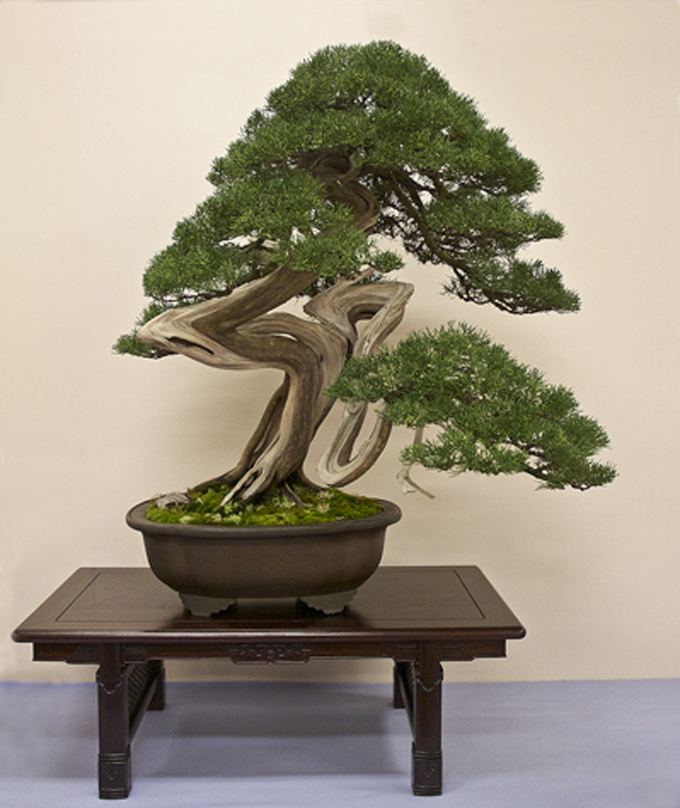
Abstract art anyone? This unusual tree with its wild lines and striking contrasts is a shore juniper (Juniperus procumbens).

Source: Bonsai Bark Read more!

Thursday, July 28, 2011

Bonsai tree: Outside the Bonsai Box – Robert Steven Critiques a MassivePemphis

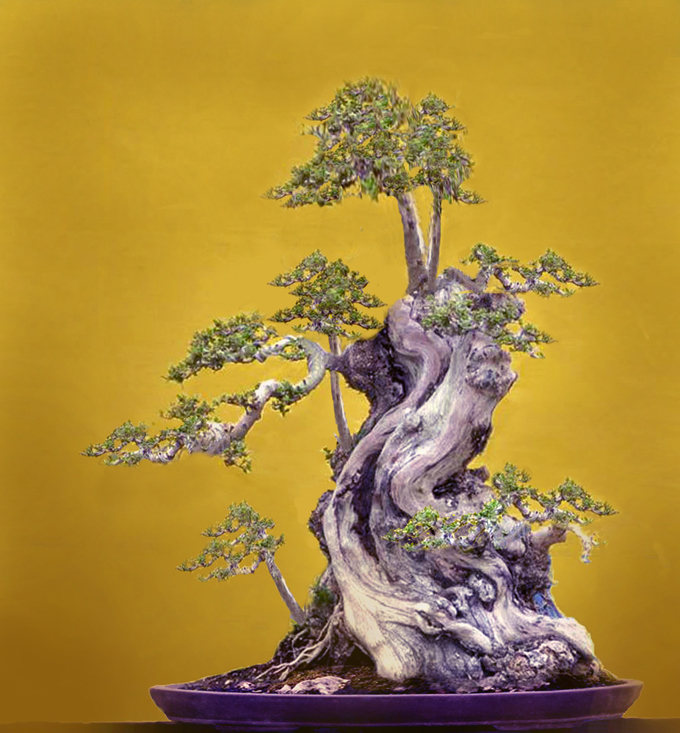
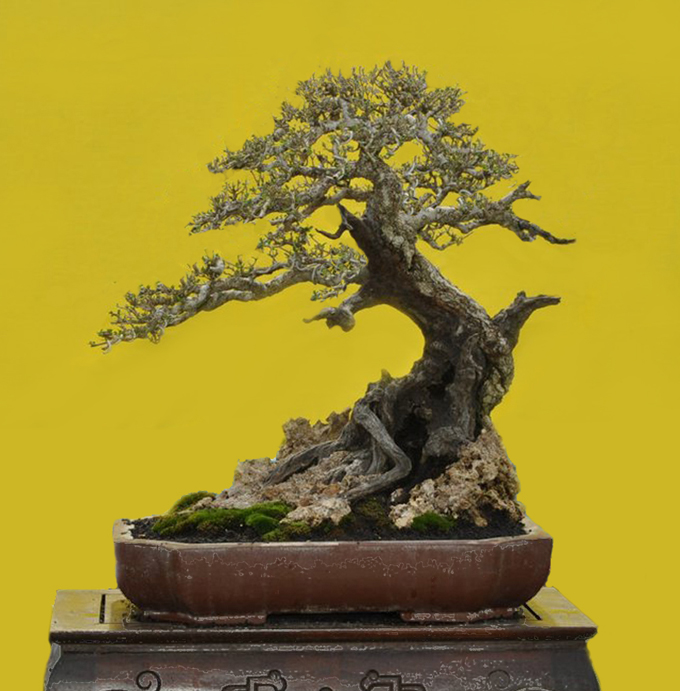
Robert Steven’s simulation of a photo submitted by Wayan (see below).

What a difference a pot makes

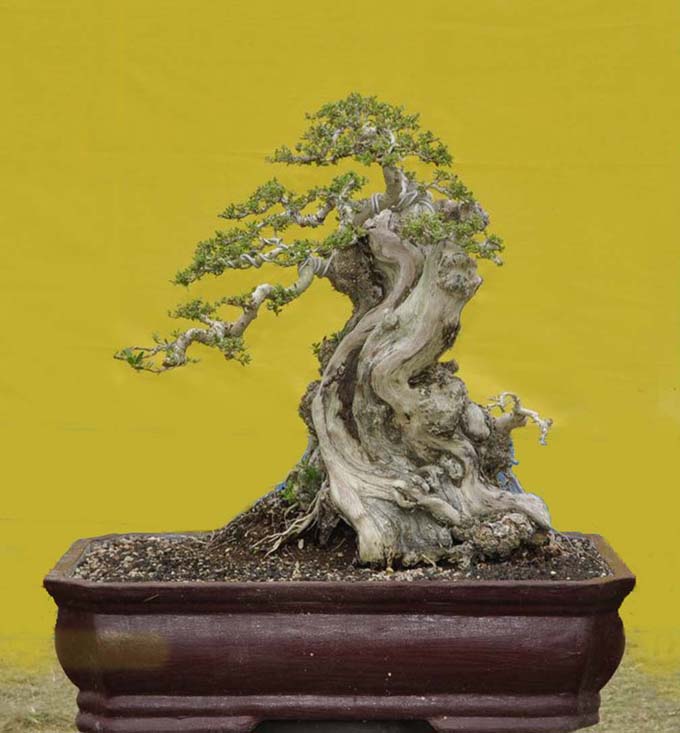
Though Robert doesn’t mention it in his critique (below), introducing a shallow pot, rather than the tree’s clunky and rather unattractive pot (also below), instantly transforms the whole tree. Nothing outside the box, just a simple change that does wonders for a bonsai.


Before. Submitted by Wayan.

In Robert’s own words

Although the trunk is very interesting, it is quite difficult to turn this tree into a design that ideally portrays a large mature tree. The stump is too bulky, so it is not easy to train the other physical elements to fit it in a proportional manner.Imagine the stump as a hill, and trees are growing here and there creating a unique composition.

Think out of the box! Make a rather “surrealistic” design…

Thanks to Pemphis which we can expect new shoots to easily grow, especially on the gnarled knots; then train every single shoot as a tree following natural phenomena as shown on the simulated picture below. The only tree to add separately is the one on the left bottom; or you can do without it if you prefer.

General comments

There is more than one way to design any bonsai and my critiques and recommended solutions might not always fit your taste and personal preferences, but I always try to give my opinion based on artistic and horticultural principles.

To understand my concepts better, please read my books Vision of My Soul and Mission of Transformation which are available at Stone Lantern.

Source: Bonsai Bark Read more!

Tuesday, July 26, 2011

Bonsai tree: Bonsai Bazaar!

Photo by Peter Tea. From Sam & KJ’s Suiseki blog. Apologies to Peter for a little cropping at the bottom.

The Green Club market

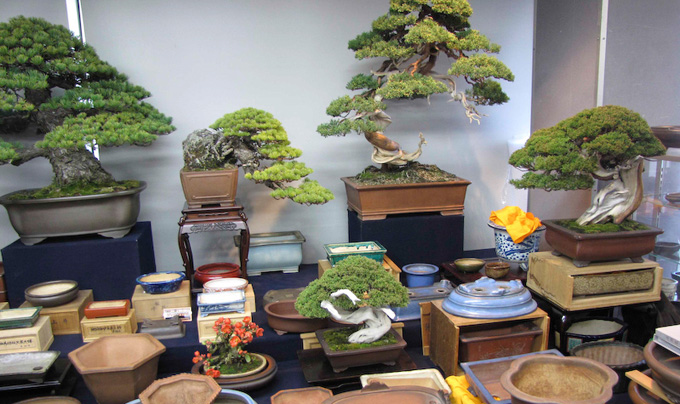
There’s more to Kokufu (Japan’s most famous bonsai show) than just the best bonsai exhibition in the world. There’s also the Green Club market; which has to be the best bonsai market in the world (if you know of a better one, please correct me). These photos offer a small taste. For the full meal, you’ll have to visit Japan.

Wanna buy a bonsai with a little potential? Photo from the Ineternet Bonsai Club, by William Feldman.

Bonsai abundance and they’re for sale, including this humble little tree. Photo by Uli Ernst (from facebook).

Not exactly a little starter plant. Maybe it’s a good thing you can’t make out the price. Photo by Uli Ernst (from facebook).

A lot of pots and suiseki are also featured. Photo by Peter Tea. From Sam & KJ’s Suiseki blog.

The tip of the iceberg (but you get the drift). The six photos shown here represent but a tiny fraction of the Green Club market. Photo from the Ineternet Bonsai Club, by William Feldman.

Source: Bonsai Bark Read more!

Monday, July 25, 2011

Bonsai tree: Becoming a Bonsai

A good reason to visit the National Bonsai and Penjing Musem? Maybe. But whatever your reason, it’s always a trip worth making.

Don’t read this post

What follows is way more polemic (and wordy) than any of my hundreds of previous posts (a rough night’s sleep is my excuse) and besides, I love the people at the National Bonsai and Penjing Museum and am loath to offend them. Still, the anti-diplomat in my nature insists on speaking his mind (always a dangerous thing).

An American tradition: bonsai from ordinary nursery stock

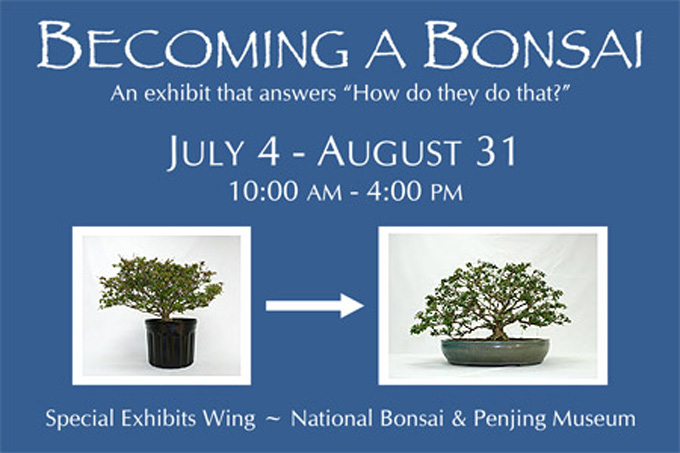
Mr. Aarin Packard, Assistant Curator of Collections at The National Bonsai & Penjing Museum, has created an interesting display titled ‘Becoming a Bonsai.’ Though I am big fan of the Museum and the folks at the National Bonsai Foundation who work with love and devotion to create and preserve a world class museum, and the display is professional, attractive, well laid out, easy to follow and altogether well done, still there are issues that a display of this type brings up.

Is it really how they do that?

I don’t think this is intentional, but even though the poster above purports to answer the question ‘How do they do that?’ the bonsai-from-nursery-stock approach has very little to do with how the bonsai at the museum (or pretty much any quality bonsai) comes into being (this may be an overstatement, as some of the techniques mentioned do apply to most bonsai, but I’ll stick to my guns).

This is not to say that there is anything wrong with trimming and wiring a well-chosen plant from a nursery and putting it in a bonsai pot (check out our $1,000 Bonsai from Scratch Contest – BTW: it’s not too late to enter). People do it all the time and many derive great satisfaction in the doing and the results. In fact, I would venture a guess that some contemporary bonsai artists got their start that way.

Beginning, middle and end

What’s so different about bonsai from nursery stock and quality bonsai? One way to approach this issue is to look at the beginning, middle and end (except for death, there really isn’t an end with bonsai) of the process we call bonsai.

The beginning: Quality bonsai starts with quality stock; almost all world class bonsai come from well-chosen collected stock or with material grown specifically for bonsai (usually field grown). The vast majority of bonsai from nursery stock will never rise above a somewhat charming little plant in a bonsai pot (the real truth is that the majority of bonsai from nursery stock will be dead within a year).

The middle: So much more than meets the eye has gone into a quality bonsai. Most of this is about time and skill. The time spent developing quality bonsai almost always amounts to years or even decades. Quality bonsai (bonsai art) just doesn’t happen overnight. This also applies to acquiring the skills necessary for styling and maintaining quality bonsai; again it’s about years, decades, or even lifetimes.

The end: The little nursery plants in bonsai pots don’t look like the quality bonsai you see in the Museum and elsewhere and the almost none ever will. This is not necessarily a problem, but is a distinction worth noting.

The real culprit: oversimplification

Perhaps oversimplification is the real culprit here (could this be a double edged sword?). Below are three examples from the Museum’s Becoming a Bonsai’s Key Concepts:

• The goal of every bonsai is to resemble a tree in nature.

• A bonsai should have the impression of great age.

• The shape of a bonsai should have a pleasingly balanced form.

• The goal of every bonsai is to resemble a tree in nature: Bonsai don’t have goals, people do. But that’s just a little grammatical thing. Though I know John Naka promoted the ‘tree in nature’ approach, and it’s an excellent approach, still not all bonsai look like trees in nature. Some bonsai are so abstract and sculptural that you would be very hard pressed to ever find a tree in nature that they resemble. True, some people don’t appreciate this highly stylized look, but few would argue that it isn’t bonsai (if you did, you’d be arguing with Masahiko Kimura, among others).

• A bonsai should have the impression of great age: Many quality bonsai do give the impression of great age, but not all do. But perhaps the most questionable part of this statement is the use of the word ‘should.’ Most people deeply involved with bonsai, view it as an art; and ‘art’ and ‘should’ are always destined to part ways.

• The shape of a bonsai should have a pleasingly balanced form: I wonder what the distance between pleasingly balanced and boringly balanced is? Perhaps dynamic (existing in the gap between balanced and unbalanced?) is more interesting. And there’s that word ‘should’ again.

Nuff said. Now for the slings and arrows.

An excellent reason to visit the National Bonsai and Penjing Museum. A photo will never do the stunning power of this ancient tree any justice. Until you see the real thing, you’ll never quite understand.
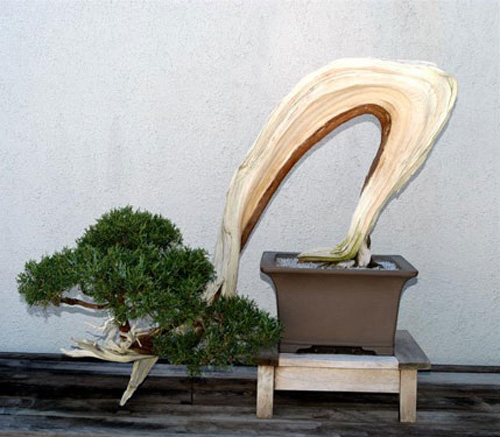
California juniper, from nursery stock (just kidding). A striking example of a bonsai that doesn’t exactly resemble a tree in nature (even though it was collected in nature, but much has happened since then). You can view this impressive bonsai by Harry Hirao (Mr. California juniper) at the National Bonsai and Penjing Museum.

Source: Bonsai Bark Read more!
Friday, July 22, 2011

Bonsai tree: Decandling before and after – red pine forest

Source: Bonsai Tonight
Decandling before and after – red pine forest

Decandling is a great technique for improving ramification or for maintaining it. What little ramification my red pine forest has can be attributed to a few years of decandling. I don’t currently have any plans to further develop the trunks in this forest, so the branches are getting all of my attention. Here is the group planting before decandling.

Red pine forest - before decandling

Red pine forest – June, 2011

1/3 done

Top 1/3 decandled

2/3 done

2/3 decandled

Decandling complete

Completely decandled

In addition to removing the spring shoots, I removed some extra vigorous branches to better balance the tree. The shoot below is quite vigorous – more than I want for this bonsai.

Branch with great vigor - it is out of balance with the other branches

Vigorous branch

The branches below are better suited for development into branch pads.

Appropriate vigor

Desirable growth

Where extra-vigorous shoots were crowding out more refined growth, I removed the vigorous shoots.

What to do with an extra-vigorous shoot?

One of these shoots is not like the others

Vigorous shoot removed

Extra-vigorous shoot removed

As I worked, I found a few anomalous shoots like those below. They weren’t spring shoots, but they weren’t exactly summer shoots either. Where did they come from?

Accelerated growth

Mystery shoots

About two months ago, I thinned these trees and shortened some of the candles – see “Thinning a red pine forest” for details. On one or two occasions, I accidentally broke the candles before they had time to develop. It was as if I “de-candled” these branches on the early side. The result of these mistakes are the strong shoots you see pictured above. As these shoots would continue to develop ahead of the properly decandled branches, I removed them to maintain balance.

Strong shoot removed

Mystery shoots removed

After removing all extra-vigorous shoots and plucking needles from some of the more dense areas, I wrapped up my work for this season.

Decandling and needle pulling complete

Decandling complete

This forest is another good candidate for wiring this fall. Once the branches are in place, I plan to repot the group in a slightly smaller pot. Read more!

Wednesday, July 20, 2011

Bonsai tree: Still the Best Bonsai Show

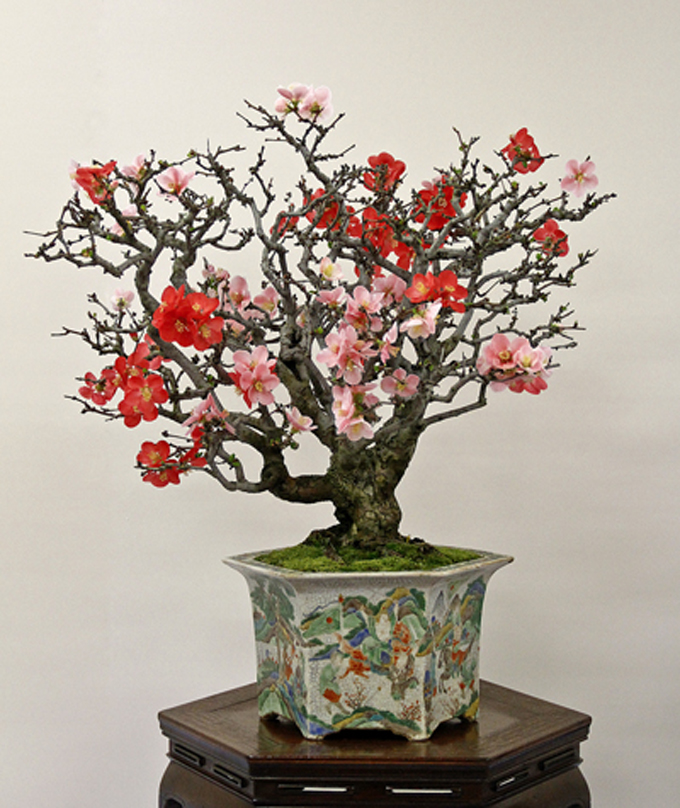
Not a prize winner, but still a mind stopper. Here’s what Bill Valavanis has to say about this remarkable quince: “An unusual cultivar of Japanese flowering quince. This is NOT the Toyo Nishiki cultivar, but rather ‘Takane Nishiki’. Beautiful flowers, unusual container, but I personally do not like the design of the bonsai, so enjoyed the blossoms.”

Bill does Kokufu

I don’t know why we didn’t feature this earlier; it’s one of the most interesting pieces of bonsai news I’ve seen for a while. It’s by Bill Valavanis, from his visit earlier this year to the Kokufu Bonsai Exhibition in Tokyo, still the best bonsai show in the world (these days with the quality of bonsai throughout the world going up every year, that’s saying something). You can find Bill’s whole story (with comments) on the Internet Bonsai Club site. Meanwhile, here’s a little teaser.
An American in Tokyo. Sargents juniper displayed by Doug Paul of Pennsylvania (The Kennett Collection). You don’t see many American exhibitors at Kokufu; this is the second that I know of and both are Doug. The other, a hemlock, was purchased in Japan from Isao Omachi (BTW: Isao lost his entire bonsai collection and his house in the tsunami). I imagine this one was also purchased in Japan, and like the hemlock may have stayed there until the show.


Source: Bonsai Bark Read more!

Tuesday, July 19, 2011

Bonsai tree: Decandling Japanese black pine

Source: Bonsai Tonight
Decandling Japanese black pine

I’ve received a lot of questions about decandling since I started writing about it. The basic idea is simple – we decandle pines to replace vigorous spring growth with less vigorous summer growth. There are, however, a number of variables to consider, from timing to needle plucking to after care. The best way to navigate these details is with an experienced teacher. If a good teacher isn’t available, I recommend experimenting – preferably with a tree you consider appropriate for experimentation. (For details about some of the variables to consider when decandling, see “Decandling secrets revealed!“)

The first time I decandled a pine on my own, I had an idea of when and what to cut, but was less clear about how the new growth would turn out. I watched the summer shoots develop very closely that year and ended up learning a lot. I’ve still a lot more to learn. Here’s what the process looked like on one of my more developed – though still young – pines this year.

Black pine

Japanese black pine – June 2011

Spring shoot

Vigorous spring shoot

Spring shoot removed

Spring shoot removed: note that I left a tiny bit of the new shoot – this is where the summer shoots will emerge

Needles thinned

Needles thinned

Branch complete

Five needles and a short stub remain

Black pine - after decandling and needle thinning

After decandling and needle thinning

The tree is more than a bit straggly at this stage. As the summer buds have begun to appear, I have to wait until fall before I can wire the tree. What does a recently decandled pine look like after a great wiring job? I recommend Peter Tea’s recent photographs of a 100-150 year old pine for an answer. See his Aichien Journal for the story. Read more!

Monday, July 18, 2011

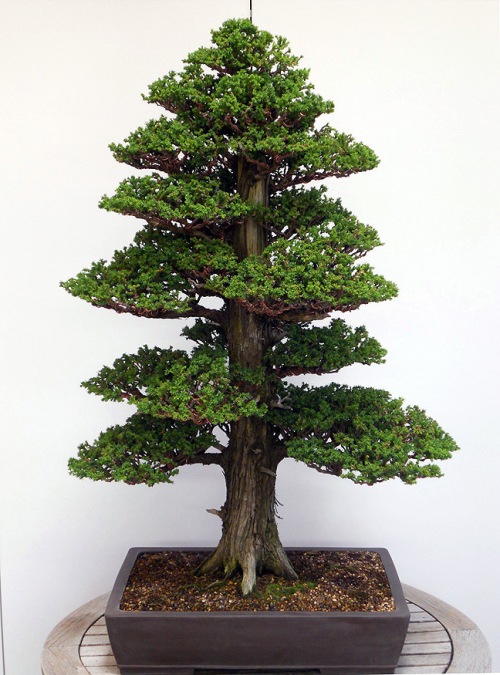
Bonsai tree: Adjusting and Maintaining a Large Cryptomeria

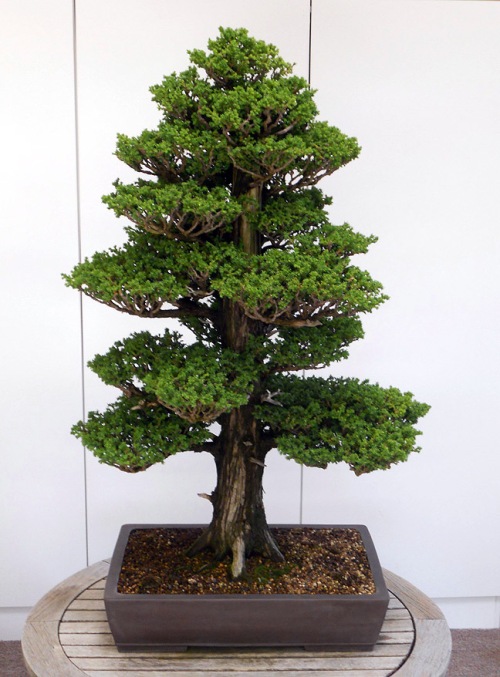
This cryptomeria was one of the standout trees in Boon’s backyard when I studied with him ten years ago. He’s been maintaining it for years. It was originally styled by Mitsuya during one of his visits to the states in the early ’90′s, and is the most significant cryptomeria I’ve seen in the United States. It’s about a meter tall, and has been developing as a bonsai for about twenty years.

One of my clients currently owns this tree and we agreed it was time to wire it again for a bit of reworking. On an established tree like this, such work is done infrequently, while the main yearly task is cutting back the growing shoots. The metabolism of this tree is slower due to its long establishment and so cutting the shoots is only about once a year, as opposed to a younger tree where pinching and cutting might be done several times over a growing season. And also debris, such as dead shoots and the like, are removed from the interior of the foliage pads at the time of shoot cutting, giving it an airy feel after the work is completed.

It is noteworthy American tree with a quiet dignity.


The Before and After photos here are rather subtle, as is commonly the case with such an established tree.


Some of the branch ends were brought down with wire, that was the main work. The wiring just allowed the form and branch structure to be crystalized a bit. In five years, this will have to be done again. And the apex needs to fill out a bit for some density on top.
Read more!

Sunday, July 17, 2011

Bonsai tree: Our Pine Book Is Here – Finally!

One of dozens of world class trees featured in our pine book. Which, by-the-way has just arrived. Better late than never.

A little gift for those of you who have been waiting

It ain’t much, but we’d like to offer each of you who pre-ordered our Pine book (before July 1st) a $5.00 discount on your next order. Just put in the comments that you pre-ordered our Pine book. Your discount won’t show up when you check out, but we’ll adjust it on this end. Meanwhile, thank you for your patience and understanding. It’s been a long strange journey (see below).

If you haven’t ordered yours yet…

now’s the time. We’ve decided to extend the discounted price (retail 29.95, discounted price 24.95). It’s worth every penny many time over.

Candle pinching. An essential needle reduction and energy balancing technique for almost any type of pine.

Elegance. Bunjin Japanese white pine.

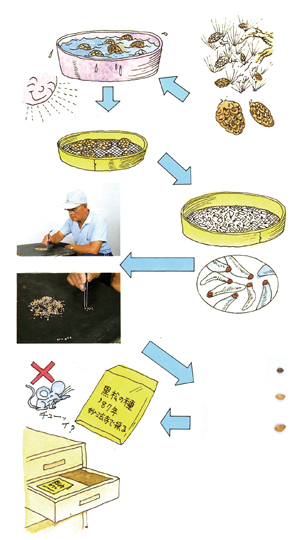
Wanna grow some black pines from seed? Here’s a few steps from the only source you’ll ever need.

It’s our story and I’m sticking to it

First it was scheduled for April. Then May. Then June. Then July. Then Tuesday this week. Then Thursday. Finally, Friday at 4pm. 5,000 pounds of books come wheeling in with one tired old driver and a lift gate that’s too small for the oversized pallets (sometimes it’s like that). On this end, it’s just me (I couldn’t go home; I live here). After machinating for about an hour we decide to off-load by hand. Just two old dudes and 5,000 pounds of pine books. The final insult (I hope!) in a long, strange and sometimes frustrating process. Turns out, it was almost fun.


Source: Bonsai Bark Read more!

Thursday, July 14, 2011

Bonsai tree: Robert Steven Critique: From Very Good to Even Better

After. Robert Steven’s simulation of Pemphis that was submitted by Soni. The before photo is below.

Before you read any further…

…take a look at the two photos and see if you can spot what’s different.

Soni’s original. Not too much to improve, though I think it would look better if the residue on the pot was removed.

In Robert’s own words

All the features of this tree look perfect, but overall it does not look very natural due to the neatly shaped round canopy.

There are two main factors that make a bonsai look natural: the ramification (branch structure) and the canopy shape. The better the ramification structure you can show on a bonsai, the more natural it will look. If you shape the canopy in more irregular form with sufficient spaces here and there, the bonsai will also look more natural.

That’s why when you look at a bonsai with a canopy that is too refined, without some open spaces, it will look artificial; too decorative rather than portraying a big tree in nature. The reason is, if you look at a tree in nature, no matter how dense the foliage is, there is always contour on the foliage surface with spaces here and there. Only a tree seen from a very long distance does not show the detailed contour, but shows only the silhouette instead. So, if you combine an illusion of long distance when it comes to the foliage, with other physical features which show close up details (the trunk with the bark for example), it doesn’t match and our sub-conscious rejects it. It simply isn’t perceived as a natural tree.

But, this doesn’t mean that you should exactly copy the way a tree looks like in nature with messy, sloppy and unrefined foliage to suggest a natural look. This has no value for bonsai as an art form. Instead, what you need is to refine is the foliage edges and ramification structure, and to create sufficient contour and spaces, avoiding foliage that is too neat and without contour.

The simulated picture (at the top) shows how changing the foliage by adding spaces give a much more natural look.

General comments

There is more than one way to design any bonsai and my critiques and recommended solutions might not always fit your taste and personal preferences, but I always try to give my opinion based on artistic and horticultural principles.

To understand my concepts better, please read my books Vision of My Soul and Mission of Transformation which are available at Stone Lantern.

Source: Bonsai Bark Read more!

Wednesday, July 13, 2011

Bonsai tree: Korean hornbeam – summer work

Source: Bonsai Tonight
Korean hornbeam – summer work

Korean hornbeam can grow dense with little effort. To encourage interior shoots, I need to thin the foliage. I do this by cutting new shoots back to 2-4 leaves and completely removing extraneous shoots from overly dense areas.

Korean hornbeam

Korean hornbeam – July, 2011

After removing the unnecessary leaves, I decided to lower a few of the branches. I remembered that the branches on the right side of the tree pointed upward a bit more than the branches on the left. You can see this more clearly without the leaves.

Setting the tree in the pot to ensure fit

January, 2011 – note upward pointing branches on the right

To make these branches better match the angles of the other branches, I used several guy wires. There are a number of ways to set up guy wires. For this tree, I stuck to a simple set-up. First step – cutting two short lengths of aquarium tubing.

Aquarium tubing

Aquarium tubing

To create an opening for the wire, I cut a slot in one of the tubes by bending it and taking a small slice from the top.

Cutting a slot

Creating an opening for the wire

This will be used for the top branch – the one to be lowered. I slip the bottom section of tubing into place as is.

Prepping the wire

Guy wire with tubing

After slipping the first section of tubing onto the wire, I place the tubing below the anchor branch and feed the ends of the wire through the openings in the tubing with the slot. I decided against shooting the set-up in place as there were too many branches in the tree’s interior to tell how things are connected. Here’s the basic set-up.

The guy wire contraption complete

Guy wire set-up

After wrapping the wire with tubing around the anchor branch and the branch to be lowered, I twist the wire with my fingers to hold it in place. I then lower the branch with one hand, and use pliers to take up the slack in the wire with the other.

Guy wire detail

Guy wire detail

Korean hornbeam

Hornbeam – after thinning and adding guy wires

Why not simply wire the branches that need to be lowered? One thin guy wire does the same work as a very heavy wire wrapped around the branch. The process is simple and uses less total wire.

Why use plastic tubing? The tubing slows the rate at which the wire cuts into the bark and it protects the bark from injury and discoloration.

I don’t know if the branches will set before the leaves fall off this autumn. If not, I’ll leave them in place – or remove and replace them – when I work on the tree this winter. Read more!