Tuesday, May 31, 2011

Bonsai tree: Thinning a red pine forest

Source: Bonsai Tonight
Thinning a red pine forest

The best time to thin pine bonsai is between late fall and early spring. I didn’t get to the red pine forest below until early April this year. Because I was working on the tree late in the season, I kept the work simple. I cut back each branch to two shoots, removed old needles, and shortened some of the longer candles. I decided against wiring the tree to avoid damaging the new candles.

Red pine forest

Red pine forest – April 2011

Shortening candles is a simple technique to weaken vigorous shoots. Letting long candles like the one pictured below puts a lot of energy into the branch, usually at the expense of weaker branches. I shortened the longest shoots to make them roughly even in size with the weaker candles. To avoid damaging the emerging needles, I broke the candles with my fingers.

Spring candle

Vigorous candle

Reduced candle

Candle shortened

I also cut back last year’s growth to two shoots per branch. As the pines in this forest are fairly vigorous, I found a lot of branches with three or more shoots per branch. Thinning to two shoots per branch helps me balance growth while creating good branch structure.

Thinning to two buds

Cutting back to two shoots

Extra shoot removed

Extra bud removed

I removed all two-year old needles and some of last year’s needles.

Two buds per shoot

First and second-year needles

Old needles removed

Second year needles removed

As sap built up on my tweezers, I cleaned them with a steel bristle brush.

Removing sap from tweezers

Removing sap

Thinning and removing extra needles gets me in good shape for next month’s decandling.

Thinning complete

Thinned branches

After thinning

Thinning complete

After reducing the vigorous candles and removing old needles and extraneous shoots, I noticed that the foliage is still a bit dense. I’ll likely remove more needles at decandling time in mid- to late June. And if I can find the time, I may also wire the tree as I have yet to completely wire the forest since its creation a couple of years ago. Read more!

Sunday, May 22, 2011

Bonsai tree: NEW! Bonsai Embroidered T-Shirts

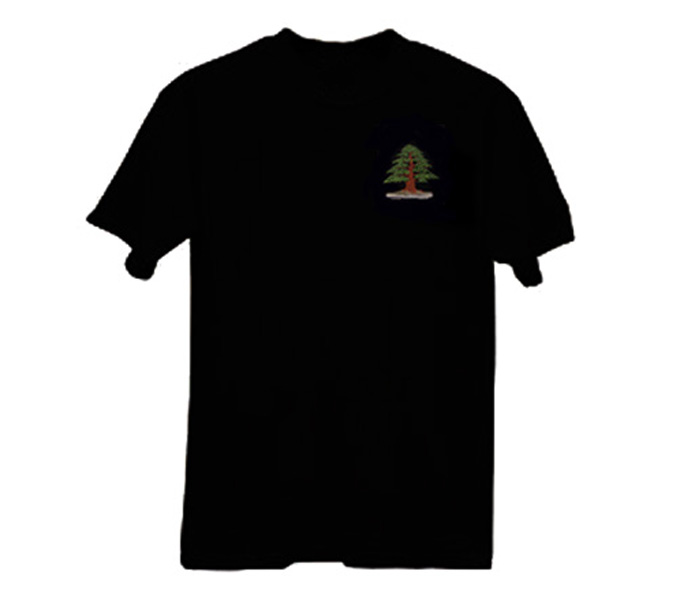
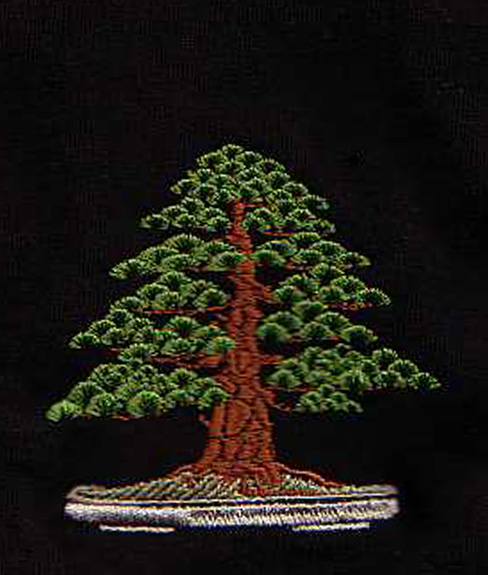
Brand new. Embroidered bonsai logo on all cotton black T-shirts.

Kimura’s legendary formal upright Japanese white pine

Long time bonsai embroidery maven Cindy Cones did a remarkable job of replicating Masahiko Kimura’s magnificent formal-upright Japanese white pine bonsai; probably the most distinctive, well-known formal-upright bonsai in the world. So distinctive and well-known that it appears in our Masters’ Series Pine book (2nd printing due in July), in The Magician, The Bonsai Art of Kimura 2 and on the cover of Bonsai Today issue 80.

Discounted prices

We’ve come up with new pricing formulas that are well below list prices on almost everything we offer. These excellent all cotton embroidered T-shirts are no exception and are good value even at the list prices. Our low prices are: M, L & XL 19.95. XXL 24.95 and XXXL 27.50.

Close up. If you know embroidery, then you’ll appreciate just how excellent the quality is.

Such blatant commercialism!

Don’t worry. It’s very rare that we indulge in such blatant commercialism on Bonsai Bark. Though we are very keen on making a living, still, our emphasis is and remains, promoting the art of bonsai (skeptics can scroll down and see if they can find the last time we devoted an entire post to something we sell).

Source: Bonsai Bark Read more!

Thursday, May 19, 2011

Bonsai tree: You Can Still Enter (and Win) Our $1,000 Bonsai fromScratch Contest

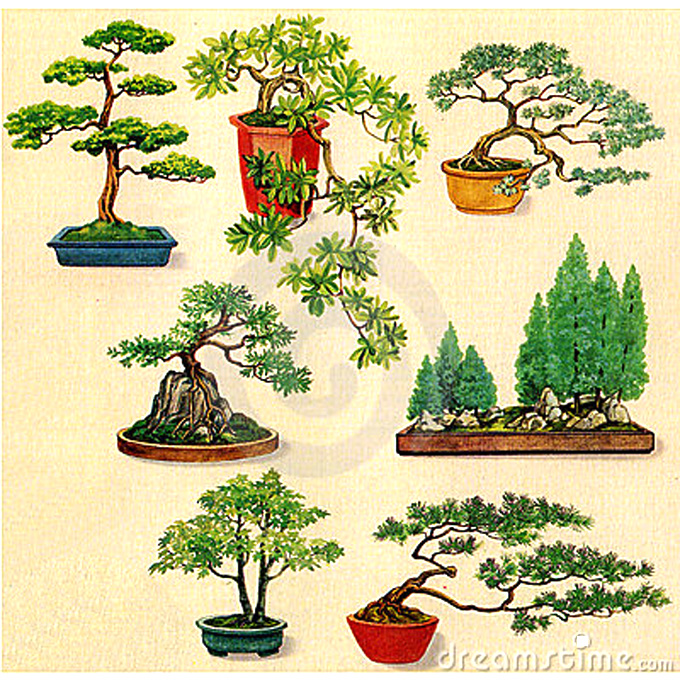
Some of these drawings look like bonsai that aren’t too far from scratch.

Don’t be intimidated!

Anyone can enter our Bonsai from Scratch Contest. Everyone’s entries will be respected, and your entry won’t be published on Bonsai Bark unless you are one of the winners. So, not to worry.

Here’s one reason why you can win

At least twelve prizes will be awarded and only about ten people have entered so far.

It’s not too late

You have until October 15th for your final submission.

Your final submission can be in a nursery container or a bonsai pot

Some trees don’t take to too much root pruning all at once. So, either way: in a bonsai, or in nursery container is okay.

Contest details and how to enter are here

If you own a bonsai business, you can offer a prize

If you would like to promote you business and help the contest along, you can submit a prize. In exchange we will acknowledge and link your website.

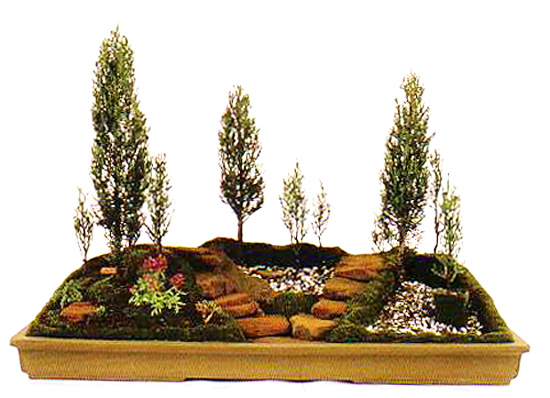
It’s fairly easy (and fun) to make saikei bonsai from scratch. This one is from Lew Buller’s Saikei and Art.


Source: Bonsai Bark Read more!

Tuesday, May 17, 2011

Bonsai tree: Restoring an old Japanese maple

Source: Bonsai Tonight
Restoring an old Japanese maple

I’d gone several years without a Japanese maple in my collection and I missed working with the variety. It’s hard, however, to find good specimen. I resigned myself to starting a tree from scratch, either by layering nursery stock or by working with an old tree that needed help. A few months ago, I found an old tree perfect for a long-term project.

The tree had long shoots in preparation for some extensive grafting. But upon a closer examination of the tree, the originally planned grafts didn’t seem to address the tree’s major flaws. The nebari is unattractive, the trunk is scarred and not particularly attractive, and there are essentially no usable branches. What potential does the tree have? The lower part of the trunk, between the nebari and the first branch, exhibits some taper without obvious scars. If I air layer the trunk an inch or two above the current roots I can create a good nebari. And by removing the top 2/3 of the tree, I can improve the taper and create well-balanced branches. Additionally, I may try to create a second tree out of the apex making this a two for one project.

Although I was anxious to get started with the air layers, I’d recently repotted the tree and didn’t want to start a layer after such a major repotting. The plan is to let new roots get established this year and keep the growth somewhat in check to prepare for an air layer or two next year.

Japanese maple

Japanese maple – before cutback

A number of the cuts were larger than 1cm. To help them heal, I cleaned the edges of the cuts with a grafting knife.

Clean cuts

Clean cuts

Clean cuts

Clean cuts

I covered the cuts with cut paste and that completed the work for this year.

After pruning

After cutback

I don’t expect a lot out of this tree, but it’s looking like I’ll have a lot of fun along the way. Why go to the effort on a somewhat dubious project? I’m essentially leveraging the age of the trunk. If I begin a similar project with a younger tree, I’ll have to wait longer for nice bark to develop. In the meantime, I’ll keep my eyes peeled for more project maples. Read more!

Thursday, May 5, 2011

Bonsai tree: Kathy Shaner & Friends in Carolina

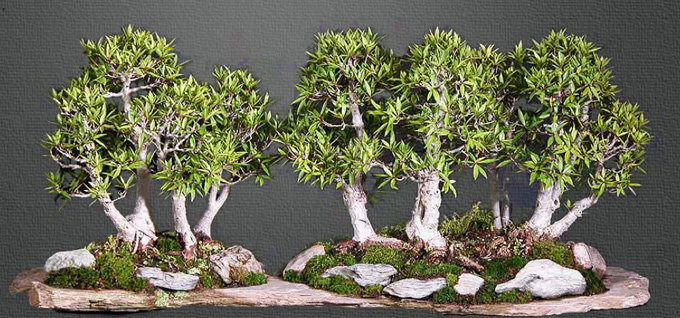
Ficus forest by Randy Clark. Bonsai Learning Center, Charlotte, North Carolina.

It’s in Charlotte and it’s not really summer yet

Bonsai Learning Center is hosting a Summer Time Picnic & Open House, May 20, 21 & 22. Aside of the fact the Randy Clark (BLC’s owner and resident bonsai artist) is a customer and a friend (if you can call someone you’ve never met face to face a friend), what really caught my attention was that Kathy Shaner will be doing two free demos and a workshop.

Kathy Shaner

Here’s what Bonsai Learning Center says about Kathy Shaner: “Starting her career in bonsai in 1983, Kathy Shaner has become internationally known and recognized for her excellence in the art of bonsai. After becoming a member of more than ten bonsai clubs and studying under several of California’s most respected instructors, she was granted an apprenticeship in Japan with master Yasuo Mitsuya. Several years later she became the first non-Japanese citizen to be certified by the professional bonsai grower’s branch of the Nippon Bonsai Association.” I believe Kathy is also the first woman to be certified. Note: I wanted to show one or two of Kathy’s bonsai, but could find none on the web.

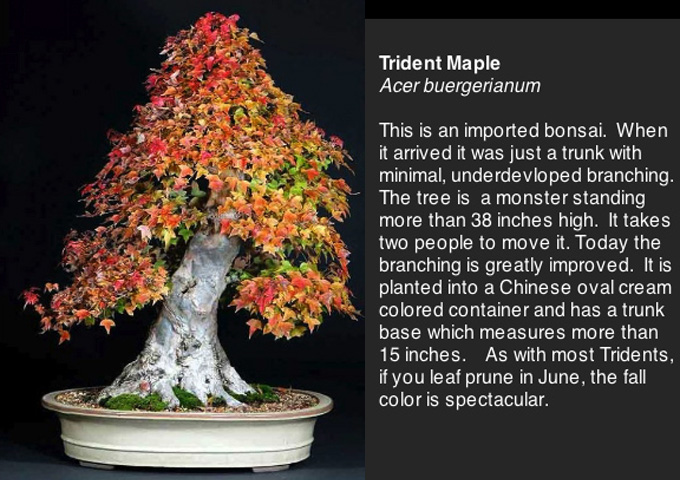
This Trident and accompanying text are from Bonsai Learning Center’s website.

Talk about a nebari (though I wonder what those dark splotches are)! Also from BCL’s website.

Source: Bonsai Bark Read more!

Tuesday, May 3, 2011

Bonsai tree: How to air layer cryptomeria for bonsai

Source: Bonsai Tonight
How to air layer cryptomeria for bonsai

I like cryptomeria bonsai a lot. Unperturbed by the warnings of how much work they can be, I’ve looked for a good specimen with little success for 10-15 years. Maybe they are too much work. Upon hearing that he would no longer be required to maintain a large cryptomeria, Boon Manakitivipart cried out, “I’m free!” Removing a single tree from a collection had added three free days to his calendar this year – and that’s just the time it takes to complete summer cutback.

I knew air layers were a great way to start cryptomeria, or tsugi, bonsai from scratch, so I bought a large tree with straight shoots from Lone Pine Gardens.

Cryptomeria

Cryptomeria

The air layer process is simple – remove bark, pack with moss, keep moist until there are enough roots to support the tree. My best candidate from this tree is a young apical shoot.

Ready to air layer

A great spot for new roots

I begin by cutting two rings around the shoot about an inch apart from each other with a grafting knife. I then remove the bark between the rings.

Removing bark

Removing the bark – note the light colored bark and darker wood below it

Bark removed

Bark removed

This is the trickiest part of the process. It’s important to remove every last bit of bark as leaving any in place will prevent roots from growing in that spot. Once the bark is removed, I cut a sheet of plastic to keep the moss in place.

Plastic wrap

Plastic sheet

Securing plastic with aluminum wire

Securing the base of the sheet with a long piece of aluminum wire.

With the plastic in place, I can start packing the plastic with damp sphagnum moss. I use the white sphagnum moss as it doesn’t turn as moldy as the green moss.

Filling pocket with wet sphagnum moss

Packing the layer with sphagnum moss

Preparing air layer

Almost done

With moss completely surrounding the area where I removed the ring of bark, I wrap up the plastic with the aluminum wire. Toward the top, I leave a gap so I can water the moss as it dries out.

Wrapping plastic with wire

Wrapping the plastic with wire

How long until I can remove the layer? We’ll see. Last year I waited almost a year which turned out to be longer than necessary. I’ll check the roots in a few months and see how they are doing. If there are enough roots, I’ll remove the layer in fall. Otherwise, I’ll wait until early spring.

Air layer complete

Air layer complete

It’s possible that I’ll have close to half a dozen cryptomeria bonsai next year – a good recipe for lots of future work. I’m looking forward to it. Read more!

Bonsai tree: The World’s Smallest Trees Need The World’s SmallestBonsai Pots

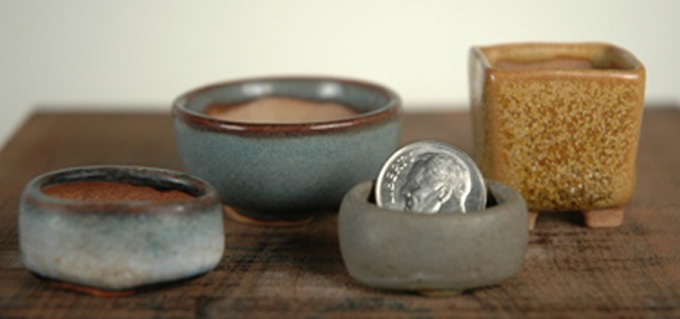
Mini pots, by Jim Barrett. No doubt there are smaller bonsai pots somewhere, but still, these are almost down to the magnifying glass range.

Two posts ago

… we featured some very small bonsai. This provoked a discussion about tiny pots where someone (Randy Davis) mentioned Jim Barrett pots. Though I am sure there are others who sell tiny pots (Robert Steven, a frequent contributor to Bonsai Bark, mentioned some that are made in China), this might provide a starting point for those of you who are interested.

Brandywine

The Brandywine Bonsai Society’s website includes a one-of-a-kind section on North American pots and potters, which is where all the photos in this post are from.

Yixing bonsai pots

BTW, in case you haven’t noticed, Stone Lantern now offers bonsai pots. Many are Yixing pots. Yixing is an area in China that is renowned for its fine clay. Some of the finest bonsai pots in the world come from Yixing.

Not quite mini, but small. By Wendy Heller (we’ve featured her before). I have some of Wendy’s earthy little pots. They are among my favorites. Photo from Brandywine.

Maybe not tiny, but most certainly striking. By Nikki D’Amico. Photo from Brandywine.

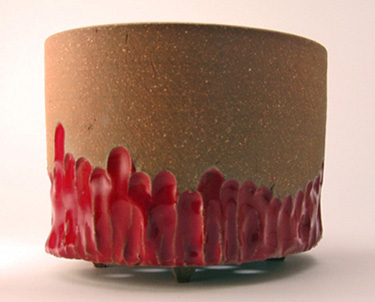
Debbie’s red nailhead. By Ross Adams. Not small, but pretty slick. I like the clean lines and glossy glaze. Photo from Brandywine.


Source: Bonsai Bark Read more!

Sunday, May 1, 2011

Bonsai tree: Strange & Wonderful Bonsai

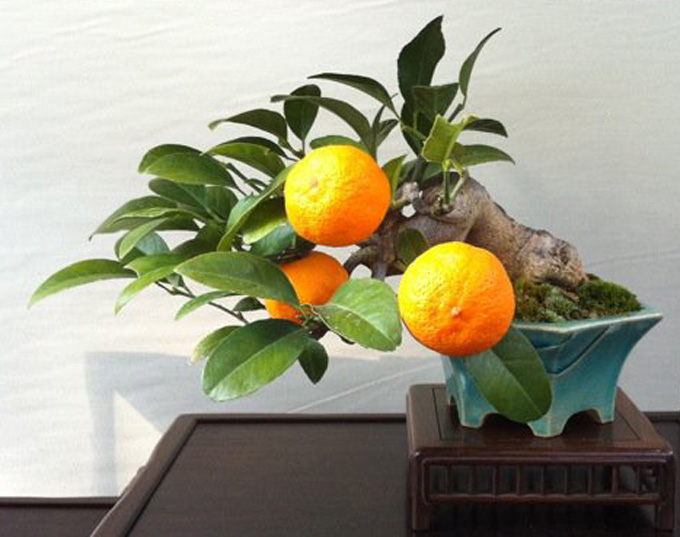
Strange and wonderful. The bonsai rules have been demolished. The leaves are too big and the fruit is massive relative to the size of the tree. But rules don’t really matter all that much, and besides, flowering and fruiting trees receive a pass anyway.

Bonsai Guest House revisited

To quote from our last post “The photos in this post are from Bonsai Guest House in Osaka. I know almost nothing about the place, but you might want to check it out on your next Japan junket.”

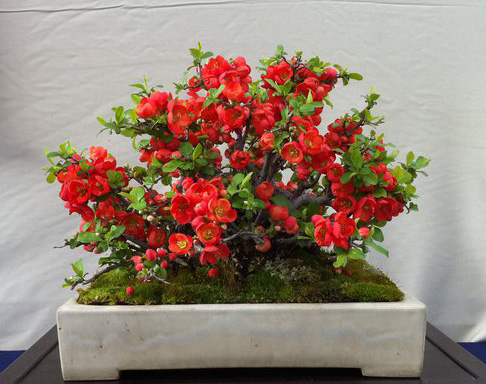
Just wonderful. Everything about this bonsai is designed to show off it’s brilliant quince flowers. If it weren’t for the flowers, no one would give this tree a second thought.


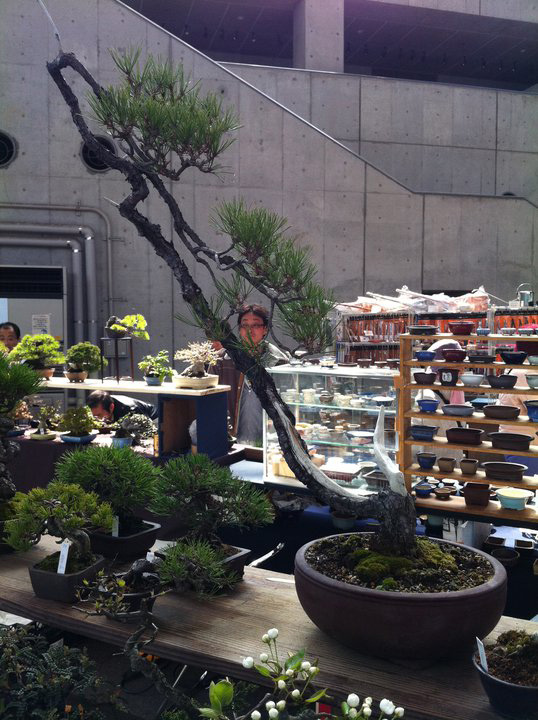
Wonderful and strange, and oh so dynamic. Got a tree that’s too tall and thin for bonsai? Don’t let that stop you.

You can do it!

Enter our One thousand dollar Bonsai from Scratch Contest. There’s a good chance you’ll win something.


Source: Bonsai Bark Read more!